
Honeywell T4 Pro Programmable Thermostat: A Comprehensive Manual Guide
This guide assists new users with their Honeywell T4 Pro‚ offering detailed instructions for installation‚ programming‚ and troubleshooting its smart features effectively.
The Honeywell T4 Pro Programmable Thermostat represents a significant advancement in home climate control‚ designed for both efficiency and user-friendliness. This thermostat isn’t just a temperature regulator; it’s a smart home hub capable of learning your preferences and optimizing energy usage.
Whether you’re a first-time thermostat user or upgrading from an older model‚ this manual provides a comprehensive walkthrough. It covers everything from initial setup and wiring to advanced programming and troubleshooting. The T4 Pro adapts to your lifestyle‚ learning how long your system takes to reach desired temperatures.
This guide ensures you can harness the full potential of your new thermostat‚ maximizing comfort and minimizing energy costs. It’s designed to be a complete resource‚ offering clear instructions and helpful tips.
Key Features and Benefits
The Honeywell T4 Pro boasts a range of features designed to enhance your home comfort and reduce energy consumption. Its programmable scheduling allows for customized temperature settings throughout the day‚ adapting to your routine. Smart Learning capabilities analyze your habits and automatically adjust settings for optimal efficiency.
A key benefit is compatibility with various heating and cooling systems‚ offering flexible installation options. The intuitive user interface‚ coupled with a clear display‚ simplifies operation. Remote access via a mobile app provides control from anywhere‚ ensuring comfort and savings.
Furthermore‚ features like temporary and permanent overrides offer convenient adjustments‚ while the locking function prevents unwanted changes.
Package Contents & What’s Included
Upon opening your Honeywell T4 Pro package‚ you’ll find several essential components to ensure a smooth installation and operation. The box includes the T4 Pro Programmable Thermostat unit itself‚ designed for easy wall mounting. A mounting baseplate is provided‚ along with screws and wall anchors for secure attachment.
You’ll also receive a detailed installation and user guide‚ offering step-by-step instructions and troubleshooting tips. Wire labels are included to simplify the wiring process‚ minimizing confusion.
Importantly‚ verify all components are present before beginning installation. Missing parts may delay setup. Contact Honeywell support if anything is absent from the package.

Installation Guide
Proper installation is crucial for optimal performance. This section details wiring diagrams‚ mounting procedures‚ and the essential C-wire connection requirements for your T4 Pro.
Wiring Diagrams and Compatibility
Understanding your system’s wiring is the first step to a successful installation. The Honeywell T4 Pro supports a wide range of heating and cooling systems‚ including forced air‚ heat pump‚ and fan coil setups. Refer to the included wiring schematics – also available as a pdf – to identify the correct terminals for your specific configuration.
Compatibility depends on your existing wiring; A C-wire (common wire) is generally required for consistent power‚ ensuring the display remains illuminated and smart features function correctly. If a C-wire isn’t present‚ consider using a C-wire adapter. Carefully match the wire labels from your old thermostat to the corresponding terminals on the T4 Pro base. Incorrect wiring can damage your system‚ so double-check all connections before proceeding.
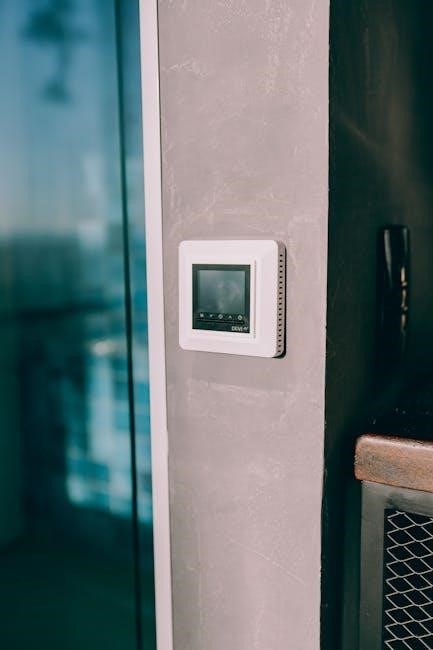
Mounting the Thermostat Base
Before mounting‚ ensure power to your HVAC system is completely switched off at the breaker. Remove your old thermostat from the wall‚ carefully disconnecting the wires and labeling each one for easy re-connection. Use the included mounting screws and wall anchors to securely attach the Honeywell T4 Pro baseplate to the wall.
Ensure the base is level for a professional appearance and proper display readability. Feed the wires through the opening in the baseplate‚ leaving enough slack for easy connection to the terminals. Double-check that no wires are pinched or strained. A secure and level base is crucial for the thermostat’s long-term stability and accurate operation.

Connecting to Power (C-Wire Requirement)
The Honeywell T4 Pro typically requires a C-wire (common wire) for consistent power. If you don’t have a C-wire‚ you may need to install one‚ potentially involving running a new wire from your furnace or using a C-wire adapter kit (sold separately). Carefully connect the labeled wires to the corresponding terminals on the thermostat base.
Proper C-wire connection ensures the screen remains illuminated for 45 seconds after adjustments and supports reliable smart features. Incorrect wiring can damage the thermostat or your HVAC system. If unsure‚ consult a qualified HVAC technician. Verify all connections are secure before restoring power at the breaker.
User Interface Overview
The T4 Pro features an intuitive interface; its display icons clearly indicate system status‚ while five buttons enable easy navigation and control adjustments.
Display Icons and Their Meanings
Understanding the icons on your Honeywell T4 Pro’s display is crucial for efficient operation. A flame icon indicates the heating system is actively running‚ while a snowflake signifies cooling is in progress. A fan symbol denotes fan operation‚ and its presence alongside heating or cooling indicates the fan is circulating air continuously.
The sun icon represents a programmed or temporary hold‚ maintaining a set temperature. A clock icon signifies the thermostat is operating on a scheduled program. When the screen wakes up after button presses‚ it remains illuminated for 45 seconds if powered by a C-wire. Other icons may indicate system changeover status or specific operational modes‚ detailed within the full user manual for comprehensive understanding.
Button Functions and Navigation
Navigating the Honeywell T4 Pro is straightforward using its five-button interface. Pressing any button awakens the screen‚ which stays lit for 45 seconds with C-wire power. The up and down arrows adjust temperature settings and navigate menu options. The ‘Menu’ button accesses scheduling‚ settings‚ and advanced features. ‘Hold/Run’ toggles between programmed schedules and temporary overrides‚ allowing manual temperature adjustments.
To cancel a timed override‚ simply press ‘Hold/Run’ again from the home screen. These buttons facilitate setting the date‚ time‚ and creating customized heating and cooling schedules. Familiarizing yourself with these functions unlocks the thermostat’s full potential for comfort and energy savings.
Programming Your T4 Pro
Effectively program your T4 Pro by setting the date and time‚ then creating personalized schedules to optimize comfort and energy efficiency within your home.
Setting the Date and Time
Accurate date and time settings are crucial for proper scheduling functionality on your Honeywell T4 Pro. To begin‚ navigate to the main menu using the thermostat’s buttons. Locate the “Date/Time” option and select it. You’ll then be prompted to adjust the year‚ month‚ and day‚ confirming each selection.
Next‚ set the hour and minute‚ paying attention to AM or PM designation. The thermostat screen will display your changes in real-time. Once both date and time are correctly configured‚ save your settings. A properly set date and time ensures your programmed schedules activate at the intended times‚ maximizing energy savings and comfort. Verify the settings periodically‚ especially after power outages.
Creating and Editing Schedules
The Honeywell T4 Pro excels with its programmable schedules. Access the “Schedule” menu from the main screen. You can create distinct schedules for weekdays and weekends‚ or customize each day individually. Define “Wake‚” “Leave‚” “Return‚” and “Sleep” periods‚ setting desired temperatures for each.
To edit a schedule‚ select the period you wish to modify and adjust the time and temperature. The thermostat allows for multiple temperature changes throughout the day. Save your changes after each adjustment. Regularly reviewing and refining your schedules based on your lifestyle ensures optimal comfort and energy efficiency. Remember to consider seasonal changes when adjusting temperature settings.
Temporary and Permanent Overrides
The T4 Pro offers flexible override options. A “Temporary Override” allows you to adjust the temperature for a set duration – typically 1 or 2 hours – without altering the programmed schedule. Select the desired duration using the navigation buttons. This is ideal for short-term comfort adjustments.
For longer-term changes‚ utilize the “Hold” function‚ effectively pausing the schedule and maintaining a constant temperature. You can choose between a “Permanent Hold” – indefinitely maintaining the set temperature – or a timed hold. To revert to the programmed schedule‚ simply cancel the hold from the main screen‚ restoring normal operation.
Advanced Features
The T4 Pro boasts smart learning‚ remote access via a mobile app‚ and a locking function for settings protection‚ enhancing user control and convenience.
Smart Learning Capabilities
The Honeywell T4 Pro distinguishes itself with intelligent learning features designed to optimize home comfort and energy efficiency. Over time‚ the thermostat diligently observes your heating and cooling preferences‚ as well as how long your system requires to reach desired temperatures. This observational period allows the T4 Pro to autonomously create a personalized schedule tailored to your lifestyle‚ eliminating the need for extensive manual programming.
This adaptive learning process continually refines the schedule‚ ensuring consistent comfort while minimizing energy waste. The thermostat proactively adjusts settings based on learned patterns‚ responding to changes in daily routines or seasonal variations. This “smart” functionality provides a seamless and convenient experience‚ delivering optimal climate control without constant user intervention‚ ultimately contributing to lower energy bills and a more comfortable home environment.
Remote Access and Mobile App Control
The Honeywell T4 Pro extends its functionality beyond the physical device through seamless remote access via a dedicated mobile application. This allows users to monitor and control their home’s temperature from virtually anywhere with an internet connection‚ providing unparalleled convenience and peace of mind. Through the app‚ you can adjust schedules‚ override settings‚ and view current system status in real-time.
The mobile app offers a user-friendly interface‚ mirroring the thermostat’s on-screen controls for intuitive operation. Receive alerts regarding extreme temperature fluctuations or system malfunctions‚ enabling prompt action to prevent discomfort or potential damage. This remote capability is ideal for vacationers‚ those with busy lifestyles‚ or anyone seeking enhanced control over their home’s climate‚ ensuring optimal comfort and energy savings.
Locking and Unlocking the Thermostat
The Honeywell T4 Pro offers a locking feature designed to prevent unwanted adjustments‚ particularly useful in households with children or where tampering is a concern. Locking the thermostat restricts access to settings‚ safeguarding your programmed schedules and temperature preferences. The process typically involves navigating through the thermostat’s menu system‚ accessing the settings‚ and selecting the “Lock” option.
Unlocking requires a specific code or navigating back through the menu with the correct permissions. This ensures that only authorized individuals can modify the thermostat’s configuration. Remember to document your unlock code in a secure location to avoid frustration. This feature provides an extra layer of control‚ protecting your energy savings and maintaining a consistent‚ comfortable environment.

Troubleshooting Common Issues
This section addresses frequent problems like power failures‚ connectivity glitches‚ and inaccurate temperature readings‚ providing solutions for a smoothly functioning T4 Pro.
Thermostat Not Powering On
If your Honeywell T4 Pro thermostat isn’t powering on‚ begin by verifying the breaker supplying power to your HVAC system hasn’t tripped. A simple reset can often resolve this. Next‚ carefully inspect the thermostat’s wiring‚ ensuring all connections are secure and correctly placed according to the installation guide.
Crucially‚ the T4 Pro often requires a “C-wire” (common wire) for consistent power. If you don’t have a C-wire‚ you may need to install one or utilize a C-wire adapter. The screen should illuminate briefly when any button is pressed‚ indicating some power is reaching the unit. If no response occurs‚ double-check the battery (if applicable) and the power supply at the furnace or air handler. Consult a qualified HVAC technician if these steps don’t restore power.

Connectivity Problems
Experiencing connectivity issues with your Honeywell T4 Pro? First‚ ensure your home Wi-Fi network is functioning correctly and that the thermostat is within range of the router. Verify you’ve entered the correct Wi-Fi password during setup within the Honeywell Home app. Restarting both your router and the thermostat can often resolve temporary glitches.
If problems persist‚ check for firmware updates within the app‚ as these frequently include connectivity improvements. Confirm that the Honeywell Home servers are operational; occasional outages can disrupt connections. Ensure no firewalls or security settings are blocking the thermostat’s access to the internet. If using a dual-band router‚ try connecting the thermostat to the 2.4 GHz network‚ as it generally offers better range.

Incorrect Temperature Readings
If your Honeywell T4 Pro displays inaccurate temperatures‚ begin by verifying the thermostat’s location isn’t affected by drafts‚ direct sunlight‚ or heat-generating appliances. These factors can skew readings. Ensure the thermostat is level and securely mounted to the wall. Calibrate the temperature within the thermostat’s settings menu; a slight adjustment can often correct minor discrepancies.
Consider that the thermostat senses ambient air temperature‚ so air circulation is crucial. Check for blocked vents near the thermostat. If the issue continues‚ a reset to factory defaults might resolve software-related errors. If you suspect a hardware malfunction‚ contact Honeywell support for assistance and potential replacement options.